Hi again.
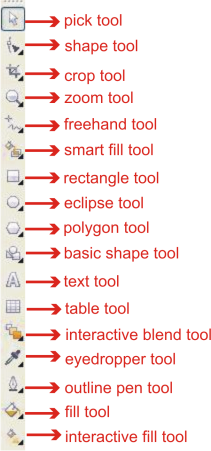
This time I'll explain more detail about the toolbox. As I stated before, toolbox serves as a means to create, manage and modify objects. Toolbox can be said as a main component that can be utilized to create designs. On toolbox there are various kinds of tools which can be categorized according to their unique functionality. They are, for example, curve-category tools, shape-category tools, dimension-category tools and so on. I will start with curve-category tools.
CURVE CATEGORY
Curve-category tools consists of tools to draw line and curve. You can also use Artistic Media tool to create a spray object, arabic-style line, or brush line.

1. Freehand Tool
Freehand tool is used to draw a free-line, or to shape object without boundaries (read: rules). The steps to use freehand tool are as follows:
a. Click on Freehand tool or press F5

A little bit different with Freehand tool, Bezier is a tool to make both straigth and curve line. This tool also has its unique characteristic in which you must determine the next tipping-point to draw a line instead of drawing the line from the beginning..To use bezier tool do the following steps:
CURVE CATEGORY
Curve-category tools consists of tools to draw line and curve. You can also use Artistic Media tool to create a spray object, arabic-style line, or brush line.
1. Freehand Tool
Freehand tool is used to draw a free-line, or to shape object without boundaries (read: rules). The steps to use freehand tool are as follows:
a. Click on Freehand tool
or press F5
b. Then do the following steps:
- To draw a straight line, click on any random point then move your mouse-pointer to another random point, and give another click.
- To draw a free line, press and hold your mouse button at the starting point and move your mouse-pointer to wherever you like to shape the line.
- Meanwhile to close a free line, left-click on one tipping-point (node) of a free line and move your mouse to another tipping-point (node) and give another click.
A little bit different with Freehand tool, Bezier is a tool to make both straigth and curve line. This tool also has its unique characteristic in which you must determine the next tipping-point to draw a line instead of drawing the line from the beginning..To use bezier tool do the following steps:
- Click Bezier tool

- To draw straight line, left-click on one random point then left-click on another random point to create a line. If you give subsequent left-click on another random point, the line will continues. To end the drawing process, simply click pick tool
 on the toolbox or press Enter.
 - To draw a curve line, left-click on first random point then press and hold your mouse-button immediately at the second/other random point. The next step is to move your mouse-pointer to the opposite direction to where you want the curve line take shape and give another click.

- You can also draw a combination of straight and curve line.
Artistic Media is a tool which distinctly unique compared to other tools on curve category in which it provides you with many interesting effects, and allows you to draw more than a common line. It produces a line with artistic flavor rather than a simple one. To use artistic media, do the following steps:
- Press and hold artistic media tool
 or press I.
 - Move the brush freely to draw an object:

- There are five tipes of artistic media tool you can utilize. To switch between them, highlight the property bar and choose one of the tools below:

 preset tool, to draw a ribbon-like closed-line
  brush tool, to draw a brush line with various color and shape
  sprayer tool, to draw a sprayed objects
-
 calligraphic tool, to draw an arabic-style or caligraphic letter
 -
 pressure tool, do draw a trapezoid-like closed line
- Finally, you can adjust the shape and size of an artistic object on the property bar, by changing its value or simply choosing another variance:

Below are some example of artistic media variances:


4. Pen
Pen's utillity is akin to that of Bezier. The difference is that pen will provides you with a "visible" line as you move your mouse pointer acrross the worksheet. To use pen, do the following steps:
- Click pen tool

- To draw a straight line, click on one random point then move your mouse-pointer to another random point and give another click.
- To draw a curve line, click on one random point and move your mouse pointer to the second random point. While at the second random point, give another press and hold your mouse button simultaneously, then begin shaping the curve line

To end the drawing process, press Enter.
5. Polyline
Polyline is very similar to Pen tool, at first you may find no difference between the two. Yet the difference will emerge when you draw a curve line. To use polyline tool, do the following steps:
- Click polyline tool

- To draw a straight line, click on one random point and move your mouse pointer to another random point then give another click.
- To draw a curve line, press and hold your mouse button then move the mouse pointer as freely as you want and try to shape a curve line.
- You can also combine between straight and free line.
- To end the drawing process, press Enter.

IMO, there is a downside of polyline tool compared to pen tool in which you can't undo the drawing process by pressing Ctrl + Z.
6. 3-Point Curve
3-Point Curve is a tool used to draw a curve line with 3-steps drawing process. To use 3-point curve:
- Click 3-Point Curve tool

- To start drawing an object, press and hold your mouse-button at one random point and move the mouse pointer to another random point then release the mouse-button (these two points/coordinates act as the basis of the curve line). Next step is to move your mouse-pointer to the direction where you want the curve line take shape and give another click.
- Finish


 New ,to create a new document
 Copy, to multiply an object
 Import, to import an object
 , Snap to, to snap object against page
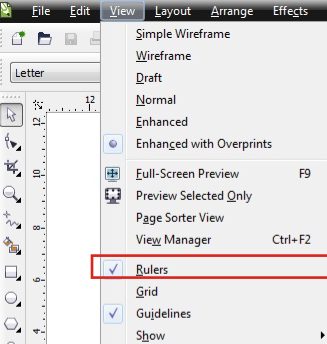
 icon is meant to show you that Ruler is in active position or currently in use. By default, the coordinate (0,0) of the Ruler laid in the left-most bottom of the worksheet.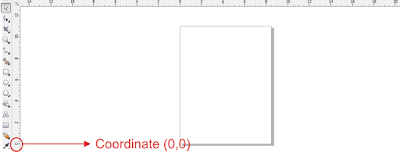

 button on the left and right side of page navigator serves to add one worksheet to the left or to the right of current active worksheet. Meanwhile the
  box is meant to show you that you are now on the first page of the whole one document.
  button serves to shift worksheet to the first one while the right arrow
  button is to shift worksheet to the last one. These two arrows will active when you have more than two sheets.
 button serves to shift one step to the left of current worksheet and the
 would serve the other way.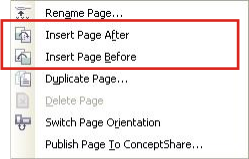
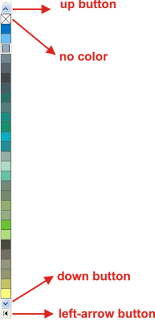
 to erase color from objects. You can also look for another color by pressing down button
  or up button
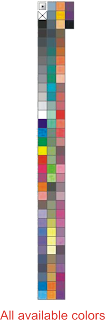
  . Meanwhile, to display all the colors available, click
  button.